
SUMMARY
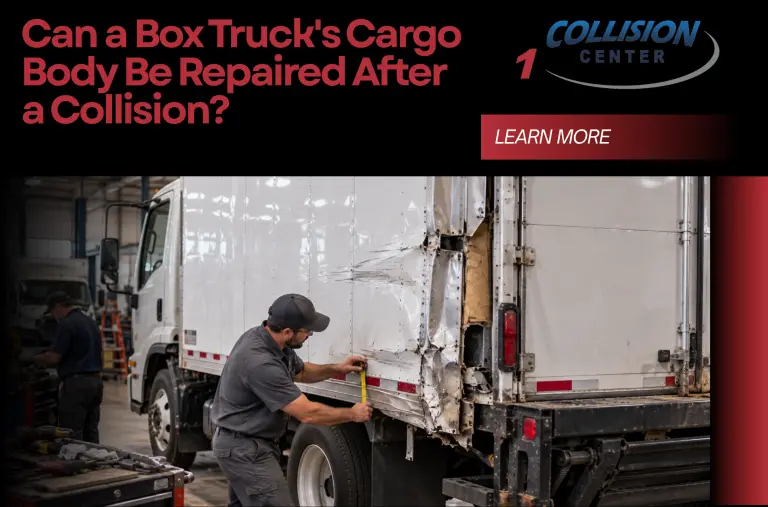
- Yes, a box truck’s cargo body can often be repaired after a collision, but the right approach depends on where the truck was hit, how severe the damage is, and which parts of the cargo body were affected.
- A collision can damage more than the visible outer wall. Technicians may also need to inspect the roof, floor, corner posts, rear frame, doors, hinges, tracks, mounting points, and interior structure.
- Small dents or localized panel damage may be repairable without replacing an entire cargo-body section.
- More severe damage involving corner posts, roof connections, floor structure, rear openings, or mounting areas can require a more extensive repair plan.
- Cargo bodies vary by manufacturer and configuration. Technicians should identify the body manufacturer, materials, dimensions, and installed equipment before deciding how repairs should be completed.
- A rear collision can affect cargo doors even when they still open. Check for changed gaps, damaged hinges, latch problems, bent tracks, or distortion around the rear opening.
- If the collision involved the lower portion of the truck, technicians may also need to inspect the chassis, rear underride equipment, suspension, wheels, tires, liftgate, and body-to-chassis mounting areas, depending on the impact.
- Additional damage may become visible after damaged panels, trim, flooring, or other components are removed, which can change the initial estimate.
- For businesses, the repair plan should also consider parts availability, specialized equipment, authorization time, and vehicle downtime.
- Farmington businesses can have box truck collision damage evaluated at Airlake Collision Center 1, 22096 Canton Cir, Farmington, MN 55024.
Your Box Truck Was Hit. Can the Cargo Body Actually Be Repaired?
Often, yes.
A collision does not automatically mean the entire cargo box needs replacement.
Depending on the damage, technicians may be able to repair individual areas such as:
- Side panels
- Front wall
- Roof sections
- Rear body components
- Doors
- Lower rails
- Corner areas
Other collisions can cause more extensive damage that requires replacement of larger components.
The first step in commercial vehicle collision repair is determining how far the damage actually extends.
What Makes Box Truck Collision Repair Different?
A box truck combines more than one major vehicle system.
You generally have the:
- Cab
- Chassis
- Cargo body
- Doors
- Mechanical systems
The cargo body itself may also have equipment added for the truck’s specific job.
Depending on the vehicle, this can include:
- Liftgate
- Shelving
- Cargo-control equipment
- Interior lining
- Lighting
- Electrical equipment
- Refrigeration-related equipment
A collision repair estimate therefore needs to identify exactly which parts of the truck were involved.
Step 1: Identify the Cargo Body Manufacturer
The truck chassis manufacturer and cargo-body manufacturer may not be the same company.
That matters.
For example, technicians may need information about the cargo body’s:
- Construction
- Panels
- Fasteners
- Rails
- Doors
- Replacement components
Record any manufacturer identification available on the cargo body.
This can help with parts and repair research.
Step 2: Identify How the Cargo Body Is Constructed
Not every box truck body uses the same materials.
Construction can vary by manufacturer and application.
Technicians should determine what materials are present before choosing a repair method.
The cargo body can contain different materials across its:
- Outer walls
- Interior walls
- Roof
- Floor
- Posts
- Rails
A repair method appropriate for one component may not be appropriate for another.
Step 3: Determine Where the Collision Occurred
Impact location provides the starting point for inspection.
Common areas include:
- Front corner of cargo body
- Side wall
- Rear corner
- Rear doors
- Lower side
- Roof edge
- Wheel area
- Liftgate area
Each creates different repair considerations.
A scrape along the middle of a side wall can produce a very different repair from a collision concentrated at a rear corner.
Step 4: Inspect the Outer Side Panel
Side-panel damage can include:
- Dents
- Scrapes
- Punctures
- Tears
- Buckling
- Creases
Localized damage may sometimes be repairable.
Other damage may require replacement of the affected panel or section.
Technicians need to evaluate:
- Material
- Damage depth
- Panel condition
- Attachment method
- Surrounding components
Do not assume an entire cargo box must be replaced because one side panel is damaged.
Step 5: Look Beyond the Visible Dent
A dent is the outside evidence of the impact.
The collision force may have stopped there.
Or it may have affected components behind or around the damaged panel.
Technicians may need to inspect:
- Interior wall
- Posts
- Rails
- Floor connection
- Roof connection
The goal is not to assume hidden damage exists.
It is to determine whether the impact affected anything beyond the exterior surface.
Step 6: Inspect the Vertical Posts
Cargo-body posts help support and shape the box.
A side impact near one of these areas may require technicians to determine whether the post:
- Remained straight
- Shifted
- Bent
- Separated from another component
Post damage can change the repair plan because the technician may be dealing with more than an exterior panel.
Step 7: Check the Lower Rail
Side impacts can occur low on the cargo body.
Technicians should inspect the lower edge and related components for:
- Bending
- Cracking
- Separation
- Changed attachment
- Other impact damage
Damage along the lower portion of the body can also justify inspection of nearby body-to-chassis mounting areas.
Step 8: Inspect the Roof Connection
A significant side impact can sometimes distort the upper portion of a cargo body.
Technicians may inspect where the wall meets the roof.
Look for:
- Changed shape
- Separation
- New gaps
- Roof-edge damage
A dent low on the side does not automatically mean the roof was affected.
The collision pattern determines how far the inspection should extend.
Step 9: Inspect the Roof Itself
Roof damage can occur from:
- Side impacts
- Overhead contact
- Rollover-related incidents
- Objects striking the upper body
Technicians should look for:
- Dents
- Tears
- Punctures
- Separation
- Water-entry concerns
A damaged roof can create a different operational problem if the cargo needs to remain protected from weather.
Step 10: Check for Water Intrusion
Collision damage can disturb joints or seals.
After damage near a:
- Roof
- Corner
- Door opening
- Wall connection
inspect for signs of water entry.
These can include:
- Damp interior surfaces
- Water marks
- Visible openings
- Damaged seals
Repairing the visible dent without addressing a collision-created opening can leave the cargo area exposed to moisture.
Step 11: Inspect the Cargo Floor
The floor can be particularly important when a collision occurs low on the body.
Depending on the impact, technicians may inspect:
- Floor surface
- Floor supports
- Connections to surrounding body components
- Damaged cargo-body mounting areas
Tell the repair facility if the truck carries particularly heavy loads or specialized equipment.
The body configuration and use can influence the repair assessment.
Step 12: Inspect the Front Wall of the Cargo Box
The front wall sits behind the cab on many box trucks.
Damage can occur from:
- External collision
- Cargo movement
- Body movement during an accident
Technicians may inspect:
- Exterior wall
- Interior wall
- Corners
- Lower connections
- Upper connections
If the cargo body moved relative to the chassis during the collision, additional mounting inspection may also be appropriate.
Step 13: Inspect the Rear Corner Posts
Rear corners are common collision points.
A rear-corner impact can potentially involve the:
- Side panel
- Rear post
- Door opening
- Roof connection
- Lower body
- Rear lighting
Because several components meet in this area, technicians should determine whether the damage is limited to one part or extends through the corner assembly.
Step 14: Inspect the Rear Door Opening
The rear opening needs to maintain the correct shape for the doors to operate properly.
After a rear collision, look for:
- Uneven door gaps
- Door rubbing
- Difficulty closing
- Changed latch position
- One door sitting higher than the other
These conditions can provide clues that the opening changed during the collision.
Does a Door That Still Closes Mean the Rear Body Is Fine?
No.
A door may continue to operate despite:
- Hinge damage
- Latch changes
- Minor opening distortion
- Damaged mounting areas
Technicians should inspect the complete rear opening when the collision occurred nearby.
Step 15: Inspect Swing Doors
If the truck uses rear swing doors, technicians may inspect:
- Door panels
- Hinges
- Hinge mounting areas
- Latches
- Locking rods
- Seals
- Door frame
A collision can change the way these components align.
The repair should restore the cause of the alignment problem rather than simply forcing the door to close.
Step 16: Inspect Roll-Up Doors
Some box trucks use roll-up rear doors.
After a rear-body collision, technicians may need to evaluate relevant:
- Door panels
- Tracks
- Rollers
- Hardware
- Opening
- Latching components
A door that suddenly becomes difficult to raise or lower should be inspected.
Do not repeatedly force a damaged door through a distorted track.
Step 17: Check Door Seals
Door seals help protect cargo from:
- Rain
- Road spray
- Dust
Collision-related changes in the door opening can prevent seals from contacting correctly.
After repair, the doors should fit the opening appropriately.
Step 18: Inspect Rear Lighting
Box trucks can have multiple lights around the rear body.
A collision may affect:
- Taillights
- Brake lights
- Turn signals
- Marker lights
- Clearance lights
- Wiring
- Mounting brackets
A light that still illuminates can have a damaged housing or mounting point.
Both operation and physical mounting should be checked.
Step 19: Inspect Side Marker and Clearance Lights
A side impact can damage lights mounted directly to the cargo body.
Technicians may need to inspect:
- Lens
- Housing
- Wiring
- Connections
- Mounting surface
Damage to the wall behind the lamp may need repair before the light can be properly reinstalled.
Step 20: Inspect Wiring Around the Cargo Body
Commercial cargo bodies can contain electrical wiring for:
- Lighting
- Liftgates
- Interior equipment
- Other accessories
A collision can potentially:
- Pinch wiring
- Cut wiring
- Damage connectors
- Pull wiring from mounting points
Electrical inspection may therefore become part of the repair when the impact occurred near these components.
Step 21: Inspect Interior Cargo-Body Damage
Do not inspect only from outside.
Look inside the cargo area.
Possible signs of collision damage include:
- Buckled interior wall
- Changed floor edge
- Exposed fasteners
- Bent post
- Separation
- Damaged shelving
The inside can sometimes reveal damage that is less obvious from the exterior.
Step 22: Check Shelving and Interior Equipment
Some box trucks carry permanent:
- Shelving
- Racks
- Partitions
- Storage equipment
A collision can affect their mounting.
Technicians should determine whether the equipment itself was damaged and whether it blocks access to cargo-body repairs.
Some interior equipment may need to be removed and reinstalled during the repair process.
Step 23: Inspect the Body-to-Chassis Mounting Areas
The cargo body ultimately needs to remain properly attached to the chassis.
A significant collision may justify inspection of relevant:
- Mounting hardware
- Brackets
- Attachment areas
- Body positioning
This does not mean every dented cargo box has mounting damage.
Inspection should follow the collision evidence.
Step 24: Determine Whether the Cargo Body Shifted
Technicians may look for signs such as:
- Body sitting differently
- Changed cab-to-body relationship
- Uneven body position
- Mounting-area damage
If movement is suspected, further inspection or measurement may be appropriate.
The I-CAR Repairability Technical Support Portal provides collision professionals with resources for researching repairability and manufacturer-specific collision procedures.
Step 25: Inspect the Chassis When the Impact Warrants It
Cargo-body damage does not automatically mean chassis damage.
However, a significant collision involving:
- Lower body
- Mounting areas
- Wheels
- Rear structure
can justify further chassis inspection.
Technicians should base that decision on evidence from the collision rather than assumptions.
Does a Damaged Box Mean the Truck’s Frame Is Bent?
No.
Cargo-body damage and chassis damage are separate questions.
A truck can have substantial cargo-body damage without frame damage.
If the collision creates reason to suspect structural movement, the appropriate areas can be inspected and measured.
Step 26: Inspect the Rear Underride Area
Many commercial trucks have rear-impact protection equipment.
If the collision occurred at the rear or lower rear of the truck, technicians should inspect the applicable equipment and mounting areas.
The Federal Motor Carrier Safety Administration provides federal motor-carrier safety and equipment regulations applicable to commercial vehicles.
Repair decisions should also account for the specific vehicle and equipment involved.
Step 27: Inspect the Liftgate
If the box truck has a liftgate, a rear collision can create additional repair considerations.
Technicians may need to inspect the:
- Platform
- Hinges
- Mounting brackets
- Hydraulic components
- Electrical connections
- Controls
- Related body mounting areas
A liftgate is not simply another exterior panel.
It is working equipment attached to the vehicle.
Can a Liftgate Still Work and Be Damaged?
Yes.
Continued operation does not automatically confirm that:
- Mounts
- Brackets
- Platform
- Related components
are undamaged.
If the collision occurred near the liftgate, have it inspected before assuming normal operation means everything is fine.
Step 28: Inspect the Wheel Area After a Side or Rear-Corner Collision
If the impact occurred near a wheel, technicians may need to inspect the:
- Wheel
- Tire
- Suspension
- Related mechanical components
Tell the shop if the wheel received direct collision contact.
That information can change the repair assessment.
Step 29: Pay Attention to Tire Damage
A commercial tire can remain inflated after an impact while still requiring inspection.
Look for:
- Cuts
- Gouges
- Sidewall damage
- Bulges
- Other impact marks
The National Highway Traffic Safety Administration provides tire safety and inspection information.
Step 30: Understand Repair Versus Replacement
Cargo-body collision repair is rarely as simple as:
dent = repair
or:
big dent = replacement
Technicians consider:
- Material
- Damage severity
- Location
- Supporting structure
- Attachment points
- Parts availability
- Body manufacturer information
A localized damaged component may be repairable.
A severely distorted section involving multiple connected components may require more extensive replacement.
Step 31: Understand Why Individual Panels May Be Replaced
A box truck cargo body can contain multiple sections.
Depending on its construction, technicians may be able to replace a damaged:
- Wall panel
- Post
- Rail
- Door
- Other component
without replacing the entire cargo body.
Whether that is possible depends on the body manufacturer and construction.
The shop should identify the exact body before developing the repair plan.
Step 32: Understand Why Parts Research Can Take Time
The chassis VIN may not identify every component installed on the cargo body.
Technicians may need additional information from:
- Body manufacturer
- Upfit manufacturer
- Equipment manufacturer
This can affect:
- Parts identification
- Pricing
- Availability
- Repair timeline
That is one reason accurate equipment documentation helps during fleet vehicle collision repair.
Step 33: Understand Why Disassembly Can Change the Estimate
Consider a box truck with:
Visible Damage
- Dented side wall
- Bent rear corner
- Damaged marker light
After disassembly, technicians may discover:
- Damaged post
- Bent lower rail
- Wiring damage
The repair estimate can then change to reflect those additional findings.
What Is a Collision Repair Supplement?
A supplement documents additional or revised repair operations after the original estimate.
It can include:
- Additional parts
- Additional labor
- Newly discovered damage
- Revised procedures
A supplement does not automatically mean the initial estimate was incorrect.
Some cargo-body damage cannot be fully evaluated until damaged components are removed.
Step 34: Consider Refinishing and Exterior Appearance
Depending on the cargo body and repair, refinishing may include:
- Surface preparation
- Primer
- Color application
- Protective coatings
- Related materials
Commercial vehicle repairs may also need to account for:
- Graphics
- Decals
- Fleet identification
- Reflective markings
Tell the repair facility about any company branding or required markings before the repair is finalized.
Step 35: Plan Around Box Truck Downtime
For a business, a damaged box truck can mean more than a repair bill.
It can affect:
- Deliveries
- Routes
- Customer commitments
- Driver scheduling
- Fleet capacity
Ask early:
- What damage has been confirmed?
- What still needs disassembly?
- Are major parts available?
- Is specialized body equipment involved?
- Are approvals pending?
- What could change the repair timeline?
That information helps fleet managers build a backup plan.
Step 36: Ask These Questions Before Authorizing Box Truck Repairs
Before approving repairs, ask:
- Who manufactured the cargo body?
- What material is damaged?
- Is the damage limited to the exterior panel?
- Are the posts affected?
- Is the lower rail damaged?
- Is the roof connection affected?
- Is the cargo floor damaged?
- Did the body move on the chassis?
- Are the rear doors still correctly aligned?
- Are hinges, latches, or tracks damaged?
- Is the liftgate affected?
- Are the body mounting areas damaged?
- Is the chassis affected?
- Are the wheels or tires involved?
- What components can be repaired?
- What components require replacement?
- Are the major parts available?
- What still needs to be inspected after disassembly?
These questions help turn a repair estimate into a repair plan the business can understand.
Frequently Asked Questions
Can a damaged box truck cargo body be repaired?
Yes. Many box truck cargo-body components can potentially be repaired or individually replaced. The correct approach depends on the body construction, materials, collision severity, damage location, and affected components.
Does a dented cargo-box wall require the entire box to be replaced?
Not automatically. Localized panel damage may be repairable or may allow replacement of an individual component, depending on the cargo body’s construction and manufacturer information.
Can a collision damage the inside of a box truck without obvious exterior signs?
Potentially. Impacts can affect posts, interior walls, floor connections, wiring, equipment, or mounting areas. The interior should be inspected when the collision location warrants it.
Should the rear doors be inspected after a box truck collision?
Yes, when the impact occurred near the rear body. Check the doors, hinges, latches, tracks when applicable, seals, and the shape of the surrounding opening.
Can a collision affect the cargo body’s mounting to the chassis?
Yes, a significant collision can potentially affect body mounting hardware or attachment areas. This should be confirmed through inspection rather than assumed from exterior damage alone.
Does cargo-body damage mean the truck frame is bent?
No. Cargo-body damage does not automatically mean chassis or frame damage. Structural condition should be evaluated separately when the collision provides reason for concern.
Why might a box truck repair estimate change after disassembly?
Removing damaged panels, doors, trim, or other components can reveal hidden damage to posts, rails, wiring, mounting areas, or other parts of the cargo body.
Where can Farmington businesses have box truck collision damage evaluated?
Businesses can contact Airlake Collision Center 1 at 22096 Canton Cir, Farmington, MN 55024 for commercial vehicle and box truck collision damage evaluation.
A Damaged Cargo Box Does Not Automatically Mean Replacing the Entire Body
A collision can leave a box truck looking seriously damaged.
But the size of the visible dent does not tell you by itself whether the entire cargo body needs replacement.
The repair decision should consider the:
- Exterior panels
- Posts
- Rails
- Roof
- Floor
- Rear opening
- Doors
- Lighting and wiring
- Liftgate
- Body mounting areas
- Chassis
- Wheels and tires
- Specialized equipment
Some damage may be localized and repairable.
Other impacts can affect multiple connected components and require a more extensive repair.
The important first step is identifying how the cargo body is constructed and how far the collision damage actually extends.
Airlake Collision Center 1 provides commercial vehicle collision repair, fleet vehicle collision repair, medium-duty truck collision repair, and heavy-duty truck collision repair for businesses operating work vehicles and trucks.
Farmington-area businesses can request an estimate or contact Airlake Collision Center 1 to discuss cargo-body collision damage and the next steps.
Airlake Collision Center 1
22096 Canton Cir Farmington, MN 55024