SUMMARY
- Commercial fleet paint matching involves more than finding a paint code. Technicians may also consider the existing finish, available color variants, panel position, paint system, and how the color looks under different lighting.
- A paint code provides an important starting point, but it does not always guarantee that newly mixed paint will visually match the truck exactly as it appears today.
- Fleet vehicles can create additional considerations because businesses often want repaired trucks to maintain a consistent appearance across the fleet.
- Technicians may use color tools, paint-system information, spray-out samples, and visual comparisons to refine the color before refinishing the repaired area.
- Metallic and pearl finishes can be particularly sensitive to application technique because the orientation of particles can influence how the color appears.
- Depending on the repair and color, paint may be blended into an adjacent panel to create a smoother visual transition rather than ending the new color abruptly at a panel edge.
- Paint blending does not correct poor panel alignment or unfinished body repairs. The damaged truck body should first be repaired and fitted correctly.
- Commercial graphics, decals, unit numbers, reflective markings, and other fleet identification should be documented before repairs because they may need to be removed and replaced.
- Paint matching should be considered during the repair plan rather than waiting until the final stage, especially when multiple body panels or specialized commercial components are involved.
- Farmington fleet operators can discuss commercial truck body and refinishing repairs with Airlake Collision Center 1 at 22096 Canton Cir, Farmington, MN 55024.
Why Isn’t Commercial Truck Paint Matching as Simple as Using the Paint Code?
The paint code matters.
It gives the refinishing team an important starting point for identifying the vehicle’s original color.
But imagine a fleet truck that has been working for several years.
Its finish has experienced:
- Sunlight
- Weather
- Washing
- Road debris
- Previous repairs
- Daily commercial use
Meanwhile, paint manufacturers may have multiple formulas or variants associated with a particular color.
That means professional commercial vehicle collision repair involves matching the new finish to the vehicle being repaired, not simply assuming that a paint-code formula will automatically create a perfect visual match.
Step 1: Identify the Truck’s Original Paint Information
The refinishing process begins by identifying the vehicle and its color information.
Technicians may use information such as:
- VIN
- Manufacturer
- Model
- Model year
- Paint code
- Existing repair information
The exact location and format of paint information varies by manufacturer.
The goal is to identify the correct starting formula for that specific vehicle.
Step 2: Inspect the Existing Finish
Next, look at the truck itself.
The existing finish is what the newly refinished area ultimately needs to work with visually.
Technicians may consider:
- Current color appearance
- Previous repairs
- Surface condition
- Adjacent panels
- Differences between different areas of the vehicle
A formula can be correct for the original production color while the truck’s current appearance introduces additional matching considerations.
Step 3: Check Whether the Vehicle Has Been Repainted Before
Fleet vehicles can have long service lives.
A truck may already have received:
- Previous collision repair
- Spot repair
- Panel replacement
- Complete panel refinishing
- Fleet color changes
If one panel was refinished years earlier, it may not look exactly like another original panel.
That history matters when determining which surrounding area should be used for color comparison.
Step 4: Understand Paint Variants
One paint code can sometimes have more than one formula variation.
These are often referred to as variants.
Why?
Production conditions and other manufacturing variables can create small appearance differences among vehicles that technically share the same paint code.
The refinishing team may therefore need to determine which available formula most closely represents the truck being repaired.
Step 5: Use Color-Matching Tools When Appropriate
Modern refinishing systems can use several tools to help technicians select or refine a color.
Depending on the paint system and repair facility, these can include:
- Digital color databases
- Color chips
- Spectrophotometer readings
- Formula variants
- Visual comparison
These tools help narrow the options.
They do not eliminate the importance of technician judgment and proper application.
What Does a Spectrophotometer Do?
A spectrophotometer is a color-measuring tool.
It analyzes the finish and provides data that can help the refinishing system identify or suggest a suitable formula.
It can be particularly useful when:
- Several variants exist
- The existing finish differs slightly from the standard formula
- Previous refinishing makes visual matching more complicated
It is a tool within the color-matching process, not a guarantee that no additional evaluation will be needed.
Step 6: Choose a Good Area for Color Evaluation
The area being measured or visually compared should represent the finish technicians are trying to match.
That can become more complicated if a panel is:
- Heavily damaged
- Scratched
- Dirty
- Previously refinished
Technicians may compare other nearby areas to understand how the vehicle’s finish currently appears.
Step 7: Prepare the Surface for an Accurate Comparison
Dirt and surface contamination can interfere with evaluating a finish.
Before comparing color, the appropriate area may need to be:
- Cleaned
- Evaluated for surface condition
- Prepared according to the refinishing process
The objective is to compare the actual finish rather than dirt or surface contamination sitting on top of it.
Step 8: Understand Why Lighting Changes How Paint Looks
Have you ever looked at a vehicle that appeared to match perfectly indoors but looked slightly different outside?
Lighting matters.
A color can appear different under:
- Direct sunlight
- Shade
- Shop lighting
- Overcast conditions
- Artificial parking-lot lighting
For that reason, color evaluation may involve viewing the finish under more than one lighting condition when practical.
Why Can Two Matching Colors Look Different Under Certain Lighting?
Different pigments can respond differently to changes in light.
This is one reason professional color matching goes beyond simply comparing two panels under one shop light.
Technicians are trying to achieve a visual match that works with the surrounding finish under normal viewing conditions.
Step 9: Understand Solid Colors
Solid colors generally do not contain the metallic particles found in metallic finishes.
That does not mean they always match automatically.
Technicians still need to consider:
- Formula
- Variant
- Existing finish
- Application
- Adjacent panels
Even a seemingly straightforward fleet white can have multiple shades or formulations.
Step 10: Understand Metallic Paint
Metallic paint contains particles that reflect light.
How those particles settle can influence:
- Lightness
- Darkness
- Flop
- Overall appearance
Application variables can affect the final result.
These can include:
- Spray technique
- Gun setup
- Distance
- Overlap
- Material application
That is why metallic matching involves both selecting the correct formula and applying it properly.
Step 11: Understand Pearl and Multi-Stage Finishes
Some commercial vehicles use pearl or multi-stage finishes.
These can involve additional layers beyond a conventional color-and-clearcoat process.
Depending on the finish, appearance can be influenced by:
- Ground coat
- Midcoat
- Number of coats
- Application technique
The refinishing process needs to account for the specific paint system used on the vehicle.
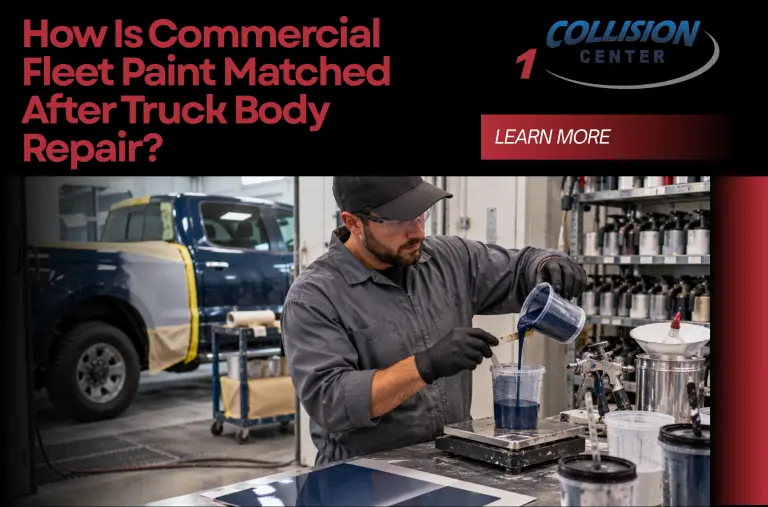
Step 12: Create a Spray-Out When Needed
A spray-out is a test application of the selected paint formula on a sample surface.
It gives the technician a way to evaluate the color before applying it to the truck.
A spray-out can help answer:
- Is the color too light?
- Is it too dark?
- Does the metallic appearance look correct?
- Does the color need adjustment?
- Is another variant a better starting point?
This can reduce guesswork before refinishing the repaired panel.
Step 13: Compare the Spray-Out to the Truck
The sample can be compared with the existing finish.
Technicians may evaluate it:
- Next to the vehicle
- At different angles
- Under appropriate lighting
The goal is not simply to make the paint look correct when viewed straight ahead.
Some finishes change noticeably depending on viewing angle.
Step 14: Adjust the Formula When Necessary
If the initial formula does not provide the desired match, the refinishing process may require adjustment.
The technician may:
- Select another variant
- Refine the formula
- Adjust application technique
- Produce another spray-out
This can happen before paint is applied to the repaired truck panel.
Step 15: Repair the Body Before Final Refinishing
Paint cannot hide incorrect body repair.
Before refinishing, collision damage should be properly addressed.
Depending on the truck, that can involve:
- Dent repair
- Panel replacement
- Panel alignment
- Surface preparation
- Component fitting
Airlake Collision Center 1 provides heavy-duty truck collision repair for trucks requiring more than cosmetic refinishing after an accident.
Can New Paint Fix Uneven Panel Gaps?
No.
Paint does not correct:
- Bent panels
- Damaged hinges
- Misaligned doors
- Incorrect panel positioning
- Structural movement
Those conditions need to be evaluated and repaired separately.
Refinishing comes after the underlying body repair has been addressed.
Step 16: Prepare the Repaired Panel
Once body work is complete, the repaired area needs appropriate preparation for refinishing.
Depending on the repair, preparation can involve:
- Cleaning
- Sanding
- Priming
- Surface leveling
- Masking
The exact process depends on:
- Substrate
- Repair
- Paint system
- Product requirements
Good color selection cannot compensate for poor surface preparation.
Step 17: Understand Why Adjacent Panels May Be Blended
Suppose a collision damages a commercial truck door.
The door is repaired or replaced.
The new color may be very close to the neighboring panel.
But ending that new color directly at the edge can sometimes make a small difference easier to notice.
Blending extends color into an appropriate adjacent area so the transition happens gradually.
The I-CAR Repairability Technical Support Portal provides collision repair professionals with resources for researching refinishing procedures and manufacturer-specific repair information.
Does Every Truck Body Repair Require Paint Blending?
No.
Whether blending is appropriate depends on factors such as:
- Color
- Repair location
- Panel arrangement
- Existing finish
- Refinishing system
- Applicable repair procedures
Some repairs can be refinished without blending into an adjacent panel.
The repair plan should reflect the specific vehicle and color.
Step 18: Understand That a Blend Panel Is Not Necessarily Damaged
This can cause confusion when reviewing an estimate.
Imagine the driver’s door was damaged.
The neighboring panel has no collision damage.
It may still appear on the estimate because refinishing operations involve blending color into that adjacent area.
That does not mean the shop is claiming the adjacent panel was dented.
Ask whether the operation is:
- Collision repair
- Removal for access
- Paint blending
- Another refinishing operation
Step 19: Consider Large Commercial Truck Panels
Commercial trucks can have large exterior surfaces.
These may include:
- Cab panels
- Hoods
- Box-truck walls
- Utility-body panels
Large surfaces can make:
- Color consistency
- Metallic orientation
- Surface preparation
- Application technique
particularly noticeable.
The refinishing approach should account for the size and construction of the component being repaired.
Step 20: Consider Different Materials
Commercial vehicle bodies can contain different substrates.
Depending on the truck, technicians may encounter:
- Steel
- Aluminum
- Composite materials
- Plastics
- Other materials
The substrate can influence:
- Repair procedures
- Preparation
- Primers
- Refinishing products
Technicians should identify the material rather than assuming every truck panel is prepared in the same way.
Step 21: Match Replacement Panels to the Existing Vehicle
A replacement body panel generally needs refinishing to match the vehicle.
The process can include:
- Preparing the replacement component
- Applying required undercoats
- Applying color
- Applying clearcoat when applicable
- Blending adjacent areas when appropriate
- Reassembling removed components
A replacement panel arriving in a primer or other unfinished state should not be confused with a finished, color-matched exterior panel.
Step 22: Document Fleet Graphics Before Repair
Commercial trucks often contain more than paint.
They may have:
- Company logos
- Unit numbers
- Department names
- Phone numbers
- DOT-related markings
- Safety markings
- Reflective graphics
- Decals
Photograph these before repairs begin.
Record:
- Location
- Size
- Layout
- Wording
This can help when graphics need to be replaced after refinishing.
Step 23: Remove Graphics When Required for Repair
A damaged panel may have graphics directly over the repair area.
Those graphics may need to be removed before:
- Body repair
- Surface preparation
- Refinishing
Trying to paint around damaged or removable graphics may not produce the intended repair.
The repair estimate should account for applicable graphic removal and replacement.
Step 24: Plan for Replacement Decals Early
Do not wait until the truck is fully painted to begin thinking about fleet graphics.
Custom decals can require:
- Design files
- Measurements
- Vendor production
- Shipping
- Installation
If a truck cannot return to service without required identification, waiting for graphics can add downtime after the body repair itself is finished.
Fleet managers should identify those requirements early.
Step 25: Consider Reflective Markings
Some commercial or municipal vehicles use reflective material.
If collision repair affects those areas, document:
- Pattern
- Location
- Size
- Material when known
The repair plan may need to account for replacing the affected markings after refinishing.
Step 26: Consider Fleet-Wide Appearance
A business may operate many vehicles using the same brand color.
However, those vehicles may differ by:
- Model year
- Manufacturer
- Original paint system
- Age
- Previous repairs
Matching the repaired truck to the finish already on that truck is generally the immediate refinishing challenge.
If a business has specific fleet-branding or color requirements, communicate those requirements before refinishing begins.
Does Every Truck in a Fleet Have Exactly the Same Shade?
Not necessarily.
Even vehicles intended to share the same general fleet color can show differences because of:
- Different manufacturers
- Different model years
- Different paint formulas
- Previous refinishing
- Finish condition
That is another reason technicians evaluate the actual vehicle rather than matching solely from a company color description.
Step 27: Tell the Shop About Custom Fleet Colors
Some fleets use a custom company color rather than the vehicle manufacturer’s standard finish.
If that applies, provide any available:
- Paint manufacturer information
- Formula
- Color code
- Previous repair records
- Fleet refinishing specifications
The more accurate information available, the easier it can be to identify the appropriate starting point.
Step 28: Keep Previous Paint Information
Fleet managers can make future collision repairs easier by keeping refinishing records.
When available, retain:
- Paint codes
- Custom formulas
- Paint-system information
- Previous repair documentation
This can be especially useful for fleets with custom branding.
Step 29: Consider Box Truck Cargo Bodies
Box trucks introduce another challenge.
The cab and cargo body may not have been painted:
- At the same factory
- By the same manufacturer
- With the same paint system
A cargo body may also use different materials from the cab.
Technicians should evaluate the actual component being refinished instead of assuming the cab paint information automatically applies to every part of the truck.
Step 30: Consider Utility and Service Bodies
Service and utility bodies can also come from separate manufacturers.
If a collision damages one of these bodies, refinishing may require identifying:
- Body manufacturer
- Existing coating
- Fleet color
- Material
This can be important during medium-duty truck collision repair, where vocational bodies and specialized equipment are common.
Step 31: Consider Previously Repaired Panels
Previous body work can affect today’s color-matching process.
Suppose a truck’s front door was refinished several years ago.
Now the rear door needs collision repair.
The technician may discover that the existing front door differs slightly from another original panel.
That does not automatically mean the previous repair was poor.
It means the current refinishing process needs to account for the vehicle as it exists today.
Step 32: Understand Why Color Matching Can Affect the Estimate
A collision estimate may include operations related to:
- Color matching
- Paint preparation
- Refinishing
- Adjacent-panel blending
- Removal of trim or components
- Fleet graphics
Ask the estimator to explain unfamiliar operations.
A complete estimate should help you understand how the finished repair will be achieved.
Step 33: Understand Why Trim May Need to Be Removed
Truck body panels often contain:
- Handles
- Lamps
- Badges
- Moldings
- Mirrors
- Other trim
Some components may need to be removed so technicians can properly prepare and refinish the panel.
That is different from saying the component itself was collision damaged.
It may simply be necessary for access or refinishing.
Step 34: Protect Areas That Are Not Being Refinished
Refinishing also involves controlling where paint materials go.
Proper preparation can include masking and protecting:
- Glass
- Adjacent components
- Interior areas
- Mechanical equipment
- Other surfaces
Commercial trucks can have large and complex shapes, making preparation an important part of the process.
Step 35: Inspect the Finish After Refinishing
After refinishing and reassembly, the repaired area can be evaluated for:
- Color transition
- Finish consistency
- Coverage
- Reassembly
- Overall appearance
Color should be considered with the surrounding panels rather than looking only at the repaired spot.
Step 36: Look at the Truck From More Than One Angle
This is particularly useful with:
- Metallic finishes
- Pearl finishes
- Large panels
Walk around the repaired area.
Look from:
- Straight ahead
- Front angle
- Rear angle
A finish can change in appearance as light reflects across it.
Step 37: Evaluate the Repair Under Useful Lighting
When practical, inspect the finish under normal viewing conditions.
Remember that paint can appear different under:
- Shop lights
- Sunlight
- Shade
- Overcast skies
A slight change under radically different lighting does not automatically identify a refinishing problem.
Color appearance is influenced by the light illuminating it.
Step 38: Check Reinstalled Fleet Graphics
If decals or graphics were replaced, inspect:
- Placement
- Orientation
- Wording
- Unit number
- Overall alignment
This is particularly important when several fleet vehicles use a consistent graphic layout.
Step 39: Keep the Final Repair Documentation
After the truck returns to service, retain applicable:
- Estimate
- Supplements
- Final invoice
- Paint information when available
- Graphic information
- Other repair records
That documentation can make future repairs easier.
Step 40: Plan Refinishing Around Fleet Downtime
Paint work is only one stage of collision repair.
The total timeline can also include:
- Damage assessment
- Disassembly
- Parts
- Body repair
- Surface preparation
- Refinishing
- Reassembly
- Graphics
- Final checks
Fleet managers using fleet vehicle collision repair should ask where the truck is in the overall repair process rather than treating painting as the final guaranteed completion date.
If graphics or other equipment still need installation, additional work may remain.
Questions Fleet Managers Should Ask About Paint Matching
Before or during commercial truck refinishing, ask:
- What paint information was identified?
- Does this color have multiple variants?
- Has the truck been refinished previously?
- Is a spray-out needed?
- Will an adjacent panel need blending?
- Why is blending being recommended?
- Are any graphics being removed?
- Do replacement graphics need to be ordered?
- Is this a custom fleet color?
- Does the cargo or utility body use a different finish?
- What components need removal for refinishing?
- Will refinishing affect the expected repair timeline?
These questions help fleet managers understand both the appearance of the repair and its effect on downtime.
Frequently Asked Questions
How do collision repair shops match paint on commercial fleet trucks?
Technicians can use the vehicle’s paint information, color formulas and variants, color-measuring tools, spray-out samples, visual comparisons, and application techniques to match the repaired area with the truck’s existing finish.
Is the paint code enough to guarantee an exact color match?
Not always. The paint code is an important starting point, but variants, previous repairs, existing finish condition, paint system, and application can influence how the color appears on the truck.
Why might an undamaged adjacent panel need paint blending?
Blending can create a gradual color transition between a newly refinished panel and the existing finish. Whether it is appropriate depends on the specific color, repair, panel arrangement, and refinishing process.
Are metallic truck colors harder to match?
Metallic finishes can require additional attention because the orientation of metallic particles and application technique can influence how the color appears from different angles.
Can custom fleet colors be matched after collision repair?
They often can, but fleet managers should provide available color codes, formulas, paint-system information, or previous repair records when the truck uses a custom company color.
What happens to company decals during truck body repair?
Graphics over or near a repair area may need to be removed before body work and refinishing. Replacement decals can then be installed after the applicable refinishing work is complete.
Can a box truck’s cargo body require different paint from the cab?
Yes. The cargo body may have been manufactured, coated, or refinished separately and may use different materials or paint information. Technicians should evaluate the actual component being repaired.
Where can Farmington fleets get commercial truck body and paint repairs?
Fleet managers can contact Airlake Collision Center 1 at 22096 Canton Cir, Farmington, MN 55024 to discuss commercial truck collision damage, body repair, and refinishing needs.
Good Fleet Paint Matching Starts Before the Spray Gun Comes Out
Commercial fleet paint matching is not simply:
Find paint code → mix paint → spray panel.
A professional refinishing process considers the vehicle that is actually in front of the technician.
That can mean evaluating:
- Original paint information
- Existing finish
- Color variants
- Previous repairs
- Metallic or pearl characteristics
- Adjacent panels
- Panel materials
- Custom fleet colors
- Graphics and decals
The body repair also needs to be completed correctly first.
Paint cannot hide a damaged mounting point, incorrect panel fit, or unfinished collision repair.
For fleet managers, planning ahead can also prevent refinishing-related details such as custom graphics or decals from unexpectedly extending vehicle downtime.
Airlake Collision Center 1 provides commercial vehicle collision repair, fleet vehicle collision repair, medium-duty truck collision repair, and heavy-duty truck collision repair for businesses operating work trucks and commercial fleets.
Farmington-area fleet managers can request an estimate or contact Airlake Collision Center 1 to discuss truck body repair and refinishing.
Airlake Collision Center 1
22096 Canton Cir Farmington, MN 55024